Vampire Fudge Recipe for Halloween – A Spooky Sweet Treat
Halloween is the perfect time of year to let your creativity shine in the kitchen. From ghostly cupcakes to pumpkin-shaped cookies, themed desserts add extra fun to the holiday. One treat that is as spooky as it is delicious is Vampire Fudge. Rich, chocolatey, and filled with a gory red “bloody” center, this dessert is both eerie and irresistible. Perfect for Halloween parties, trick-or-treat gatherings, or a spooky family night, this Vampire Fudge recipe will definitely steal the show.
In this article, we’ll walk through everything you need to know: ingredients, step-by-step instructions, tips for making it extra spooky, variations, and serving ideas.
What is Vampire Fudge?
Vampire Fudge is a Halloween-inspired dessert made with layers of creamy chocolate fudge and a sweet, gooey red filling that oozes out when cut, mimicking “vampire blood.” The vibrant red layer is usually made with raspberry or strawberry preserves, cherry pie filling, or even a simple red gel. The contrast between the rich chocolate and the sweet fruity center makes this fudge both creepy and delicious.
It’s a fun twist on traditional fudge and is easy enough for beginners but impressive enough to wow a Halloween party crowd.
Ingredients for Vampire Fudge Recipe
Here’s what you’ll need to make this spooky treat:
For the chocolate fudge layers:
- 3 cups semi-sweet chocolate chips
- 1 (14 oz) can sweetened condensed milk
- 4 tbsp unsalted butter
- 1 tsp vanilla extract
For the “vampire blood” filling:
- ½ cup raspberry or strawberry jam (you can also use cherry pie filling)
- Red food coloring (optional, to intensify the “bloody” effect)
Optional toppings:
- Red sprinkles
- Halloween candy eyes
- Crushed cookies for texture
How to Make Vampire Fudge
Follow these step-by-step instructions for the best results:
Step 1: Prepare the pan
Line an 8×8-inch baking dish with parchment paper, leaving some overhang on the sides for easy removal later. Lightly grease the parchment with butter or cooking spray.
Step 2: Make the first fudge layer
In a saucepan over low heat, melt the chocolate chips, sweetened condensed milk, and butter. Stir constantly until smooth and glossy. Remove from heat and mix in vanilla extract.
Pour half of the mixture into the prepared pan and spread evenly. Place in the refrigerator for 10–15 minutes to slightly set.
Step 3: Add the “blood” filling
Spread the raspberry or strawberry jam evenly over the first fudge layer. For extra creepiness, stir in a few drops of red food coloring before spreading.
Step 4: Top with remaining fudge
Pour the rest of the chocolate fudge mixture over the jam layer. Smooth the top with a spatula, ensuring the red filling is completely covered.
Step 5: Chill and set
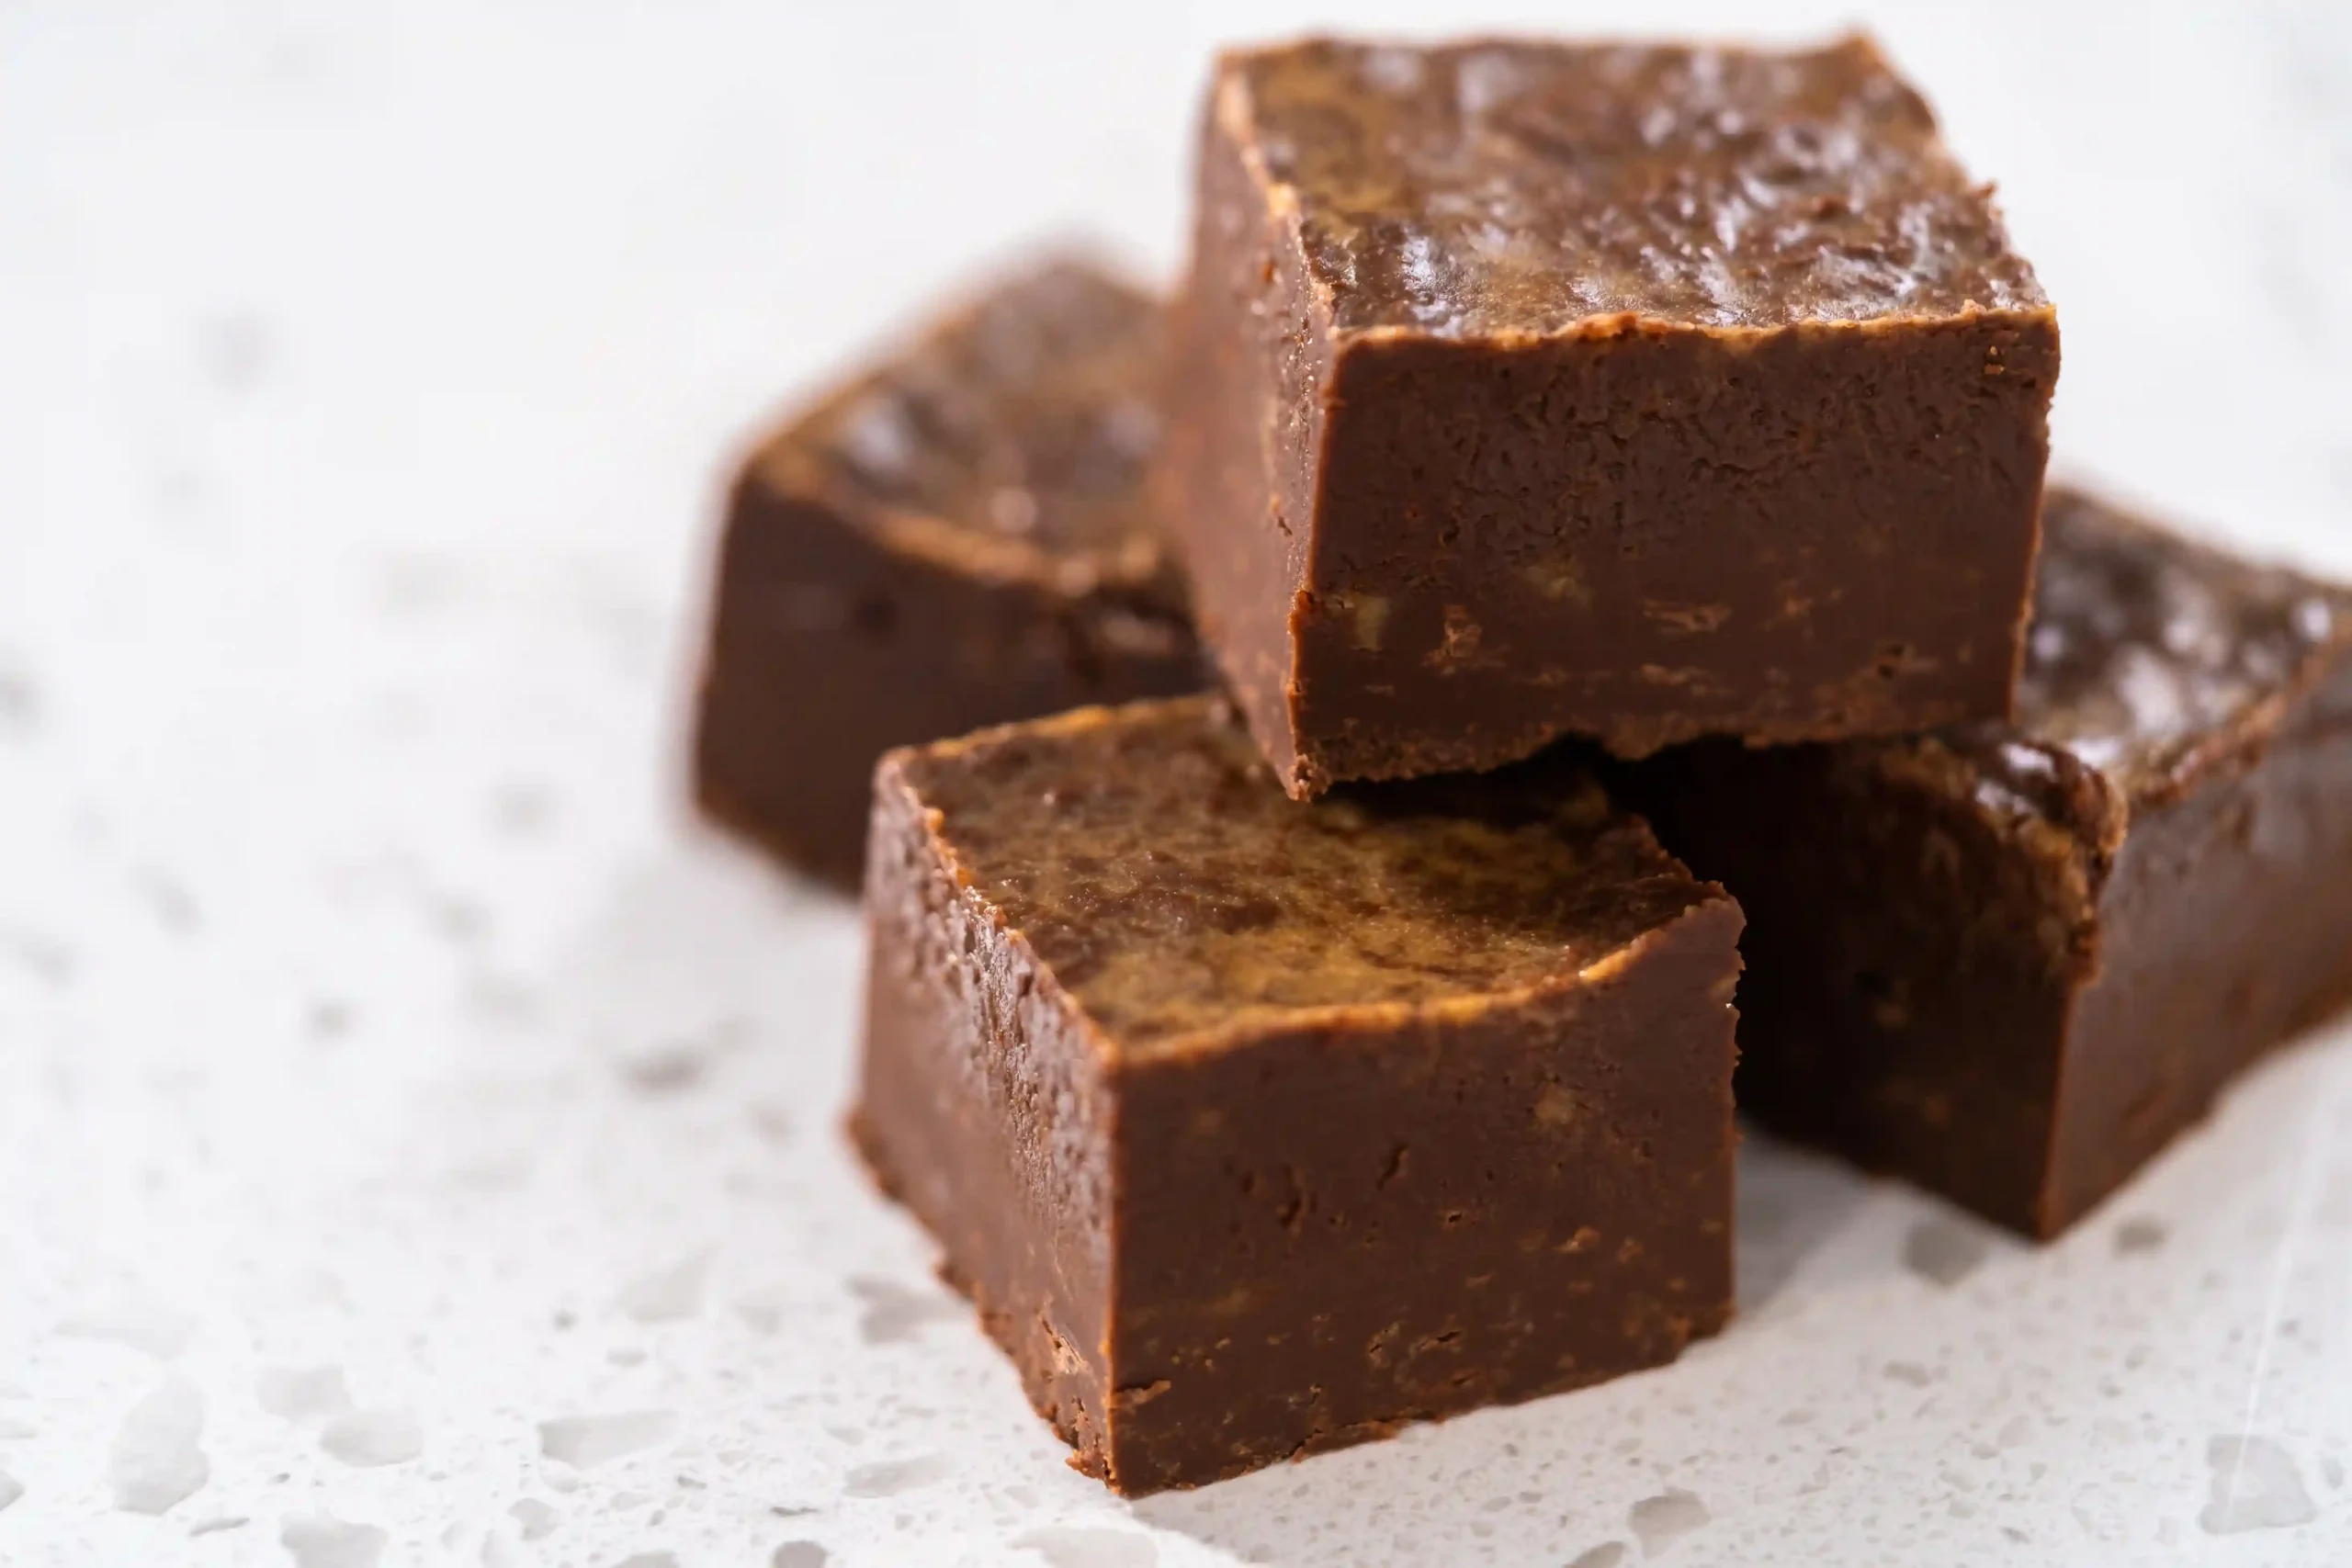
Refrigerate the fudge for at least 2–3 hours or until fully set. Once firm, lift it out of the pan using the parchment paper and cut into small squares.
When you cut through the fudge, the “bloody” jam oozes slightly, creating the spooky vampire effect!
Tips for the Best Vampire Fudge
- Use quality chocolate chips – The flavor of the fudge depends heavily on the chocolate. Semi-sweet or dark chocolate works best.
- Don’t overheat the chocolate – Melt gently on low heat or use a double boiler to avoid burning.
- Add red gel or jam generously – The more filling you use, the spookier the effect when cutting.
- Chill before slicing – Cutting warm fudge can make it messy; chilled fudge holds its shape better.
Fun Variations
Want to get creative with your Halloween Vampire Fudge recipe? Try these ideas:
- Nutty Vampire Fudge – Add crushed almonds, pecans, or walnuts to the top layer for crunch.
- White Chocolate Version – Replace the top layer with white chocolate for a dramatic black-and-white look against the red filling.
- Extra spooky toppings – Add candy eyeballs, gummy fangs, or Halloween sprinkles to the surface before the fudge sets.
- Marble effect – Swirl some red gel into the top fudge layer for a “bloody” marbled design.
Serving Ideas
Vampire Fudge is perfect for:
- Halloween dessert tables – A spooky yet sweet centerpiece.
- Party favors – Wrap individual pieces in clear bags tied with orange or black ribbon.
- Kids’ treats – Little ones will love the “bloody” surprise inside.
- Movie nights – Pair with a Halloween film for a themed snack.
Serve it alongside other spooky goodies like spider web brownies, mummy cookies, or pumpkin whoopie pies for a full Halloween spread.
Storage Instructions
- Refrigerator – Store in an airtight container for up to 1 week.
- Freezer – You can freeze fudge for up to 2 months. Wrap tightly in plastic wrap and place in a freezer-safe container. Thaw in the fridge before serving.
Why You’ll Love This Recipe
- Super easy to make, even for beginners.
- No candy thermometer required.
- Perfect balance of chocolatey richness and fruity sweetness.
- Fun, spooky effect that kids and adults love.
Conclusion
If you’re looking for a spooky yet delicious Halloween dessert, Vampire Fudge is the perfect recipe. With its rich chocolate layers and a gory red filling, this treat is sure to impress guests and bring festive fun to your celebrations. Whether you serve it at a Halloween party, gift it to friends, or enjoy it at home, this fudge will be a hit.
Frequently Asked Questions (FAQs)
1. Can I make Vampire Fudge ahead of time?
Yes, you can prepare it in advance and store it in the fridge for up to 5–7 days or freeze it for up to 2 months.
2. How do I make Vampire Fudge without jam?
You can swap jam with red gel icing, cherry pie filling, or melted red candy to keep the spooky “bloody” effect.
3. Can I make this fudge vegan?
Absolutely! Use dairy-free chocolate, coconut condensed milk, and plant-based butter for a vegan-friendly version.
4. What’s the best way to cut fudge neatly?
Dip a sharp knife in hot water, wipe it clean, and slice. This helps create smooth, even cuts without smudging.
Read more: